3.1 KiB
Help pages - Connection
If this documentation was not useful enough for you, feel free to ask any question in HA Client on Descord
{% include in_post.html %}
Quick start
When first launching the app you will be presented with Quick start screen asking you to provide your Home Assistant url and device name for Mobile App integration.
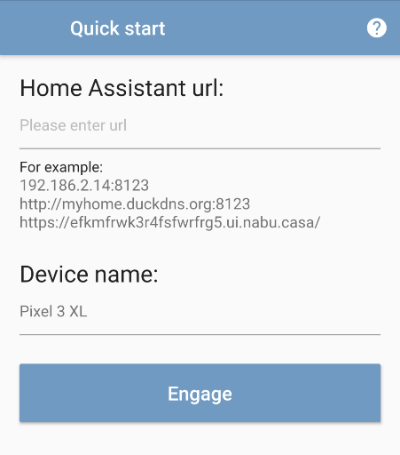
You can just copy your Home Assistant url from browser and use it in the app:
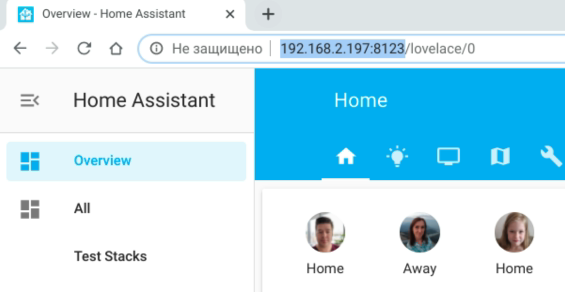
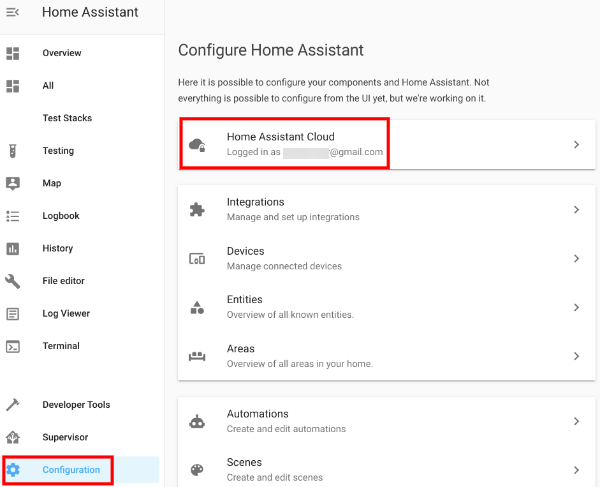
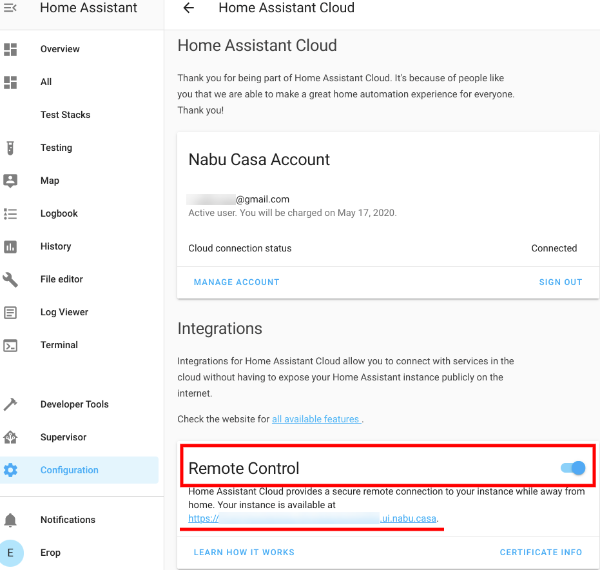
The easy and secure way to aceess you Home Assistant from anywhere (not only from your local network at home) is Remote UI. If you alredy had it set up, just open your Home Assistant UI in browser, go to Configuration - Home Assistant Cloud, find Remote Control section and copy the url from Your instance is available at.
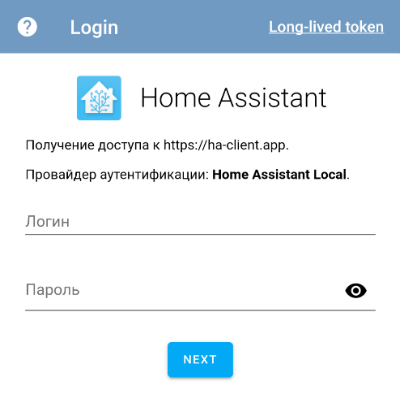
Now you need to login. And this process will be almost automatic thanks to Home Assistant Authentication API. You'll see a login form loaded directly from your Home Assistant instance:
That's it! You are ready to go.
{% include in_post.html %}
Advanced
SSL Certificates
The main requirement is that your SSL Certificate should not be self-signed. Most certificates from providers like Let’s Encrypt will work. There is known issue with RapidSSL certificate, but this problem is common not only for HA Client.
Using of self-signed certificate is not possible for now and this is a restriction of Flutter’s WebSocket implementation.
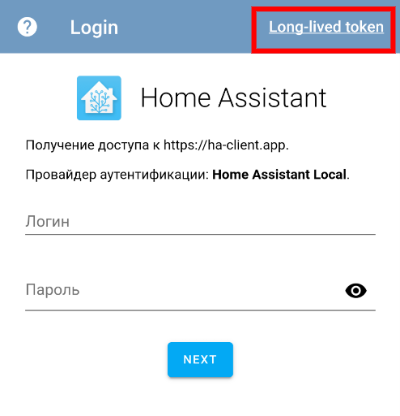
Login with long-lived token
It is possible to generate long-lived token manually and set the app to use it instead of logging in with a simple OAuth way. To make HA Client use your generated long-lived token you need:
- Go to your Home Assistant web interface and open your profile settings (just click on your user picture in the bottom part of main menu)
- Scroll down to Long-lived access tokens section and click Create token
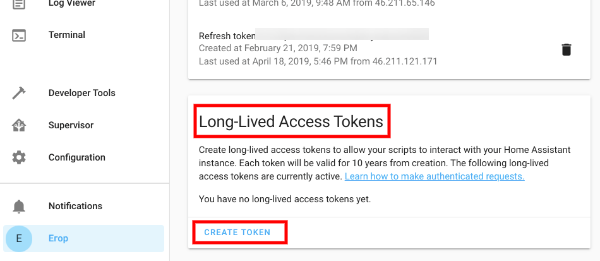
- Give it a name
HA Clientas it will be used only for HA Client app (it is recommended to use different access tokens for different apps and services) - Click Ok and copy newly generated access token somewhere in a safe place or directly to HA Client: